Free Embeddable Forums for Blogger & How to Embed These Forums
For users of blogger, there are only a couple of free options available for adding a forum to the site.

Nabble:
Nabble.com, available both in free and paid versions, offers a really simple forum with a neat layout and lots of useful option. Embedding it to your blogger/blogspot site is easy:
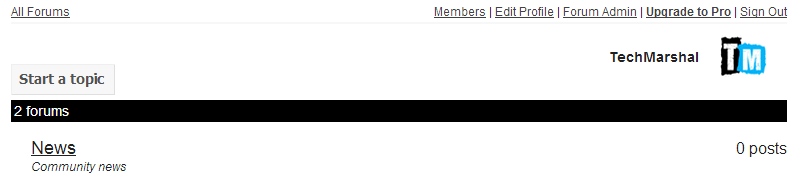
- Go to Nabble.com, click 'start a new forum' and fill in the details. Verify your account.
- Create sub-forums by going to Options > Structure > Create New Sub-Forum (Make sure you're logged in).
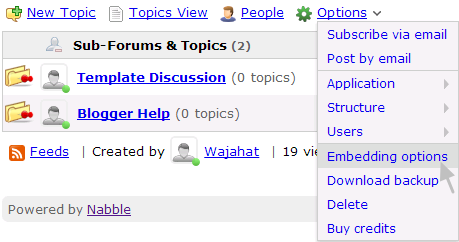
- Now for embedding, head over to Options > Embedding options.
- Copy the JavaScript code.
- Finally, create a new page on your blog and paste the JavaScript code you copied in step 4 and paste it into the HTML editor mode there.
- Publish your page.
Tal.ki:
Tal.ki by Lefora has been available for quite some time now. Like Nabble, it is also available as free and paid. The paid $5 version comes with no restrictions. However the free version is limited to 15 recent topics and 5 sub-forums. Tal.ki offers a seriously simple way of adding a forum to your website. Just paste the provided code to your page and suddenly the site has a fully functional forum embedded right there. You can load login with your Facebook, Google, blogger and a number of other accounts. The first person to login will become the admin.
Google Groups Forum
If you still have an active online community on Google Groups Forum, you can easily embed the forum on your blog. Simply head over to the HTML editor and add the following code:
<iframe frameborder="0" height="700" width="100%" id="forum_embed" scrolling="no" src="https://groups.google.com/forum/embed/?place=forum/NAME_OF_FORUM#!forum/NAME_OF_FORUM">
Be sure to replace the 'NAME_OF_FORUM' with your actual forum's name on both places.

About Blogger Conditional Tags and How To Use Them Properly
You may wish to hide a widget or element on one page and display it on the other, need to remove the sidebar on certain pages, or even display buttons on select pages. This is exactly where conditional tags come into play. There are a number of tags available for blogger which, if applied correctly, will help you modify elements of your template.

List of conditional tags
The following are a select few conditional tags you'll require the most:- Homepage:
- First post: For targeting the first post on multi-post pages.
- Specific page/URL:
- Posts (item):
- Static pages:
- Index pages (includes homepage, label pages and archive pages):
- Archive pages:
- Posts and static pages:
- Label-search pages:
- 404 Error Page:
- Mobile Pages:
<b:if cond='data:blog.url == data:blog.homepageUrl'>
<b:if cond='data:post.isFirstPost'>
<b:if cond='data:blog.url == "ENTER_URL_HERE"'>
<b:if cond='data:blog.pageType == "item"'>
<b:if cond='data:blog.pageType == "static_page"'>
<b:if cond='data:blog.pageType == "index"'>
<b:if cond='data:blog.pageType == "archive"'>
<b:if cond='data:blog.url == data:post.url'>
<b:if cond='data:blog.searchLabel'>
<b:if cond='data:blog.pageType == "ERROR_PAGE"'>
<b:if cond='data:blog.pageType == "data:blog.isMobile"'>
How to Use conditional tags
Using conditional tags is simple. Each tag needs to be closed with a closing </b:if> tag. All you have to do is select the suitable tag and place the content between the opening and the closing tag like this:
<b:if cond='THE_CONDITION_GOES_HERE'>
...
</b:if>
For Example:
You need to display the content only on Index Pages (homepage, archives and labels page). The following tag will be applied:
<b:if cond='data:blog.pageType == "index"'>
...ENTER CONTENT HERE...
</b:if>
The double equals " == " actually means TRUE. You can change the condition to FALSE, then just replace the first equal with an exclamation sign: " != ".
Reversing a Condition:
Example:
<b:if cond='data:blog.pageType != "index"'>
... THE CONTENT ...
</b:if>
In the example above, the content will show up on all pages other than "index" pages.The ELSE Statement <b:else/>:
In case you need to display alternate content, insert a <b:else/> tag like this:<b:if cond='data:blog.pageType == "index"'> ...Content 1... <b:else/> ...Content 2... </b:if>In the example above "Content 1" will only appear on Index Pages (homepage, archives and labels page), and if its not an Index Page, "Content 2" will be displayed.
Combining Conditions Together:
<b:if cond='data:blog.pageType == "item"'>
<b:if cond='data:blog.url != "URL_OF_POST_TO_EXEMPT"'>
...ENTER CONTENT HERE...
</b:if>
</b:if>
Finally, in the example above, the content will show up on all posts except a certain URL/Post specified.
How to Add Adsense Ads After First Post On Blogger Homepage

Among the several conditional tags available for blogger, one is specifically written to target the first post - a good position for displaying ads. And here's how you too can insert Adsense after the first post on your blogger blog:
The Steps:
- Login to Blogger Dashboard
- Go to Template > Edit HTML
- Find this line of code in your template
- Add the following code just below the code above
- Finally grab a suitable Adsense unit, parse it and add it to the code above
<b:include data="post" name="post">
<b:if cond='data:blog.pageType == "index"'> <b:if cond='data:post.isFirstPost'>---- Replace this line with your Adsense Code -----</b:if> </b:if>
That's it. You can now monitor the newly added ad unit for clicks.
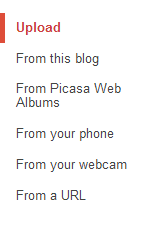
Fix the "Blogger Images Not Uploading" Problem
Clear Browser's Cache:
Start by clearing your browser's cache. Many browser related problems including pages that freeze, don't finish loading, or contain old content can be fixed by clearing your cache.
Disable Plugins:
Disable any Plugins/Extensions on your browser. Plugins may cause incompatibilities with the post editor.
Enable Popups:
Enable popup on your browser or add an exception to blogger.com on your popup blocker. Sometimes popup blockers will prevent the image upload window from appearing.
Enable 3rd Party Cookies:
Make sure all 3rd Party Cookies are enabled in your browser.
Restart your browser:
Once you have tried the above three steps, you may also wan't to try and restart your browser.
Try a different browser:
Sometimes changing your browser may do the job for you. If you are using Chrome, try Firefox, IE or Opera.
Subscribe to:
Posts
(
Atom
)


No comments :
Post a Comment
Leave A Comment...