The Journalist: A Simple Responsive Template for Blogger
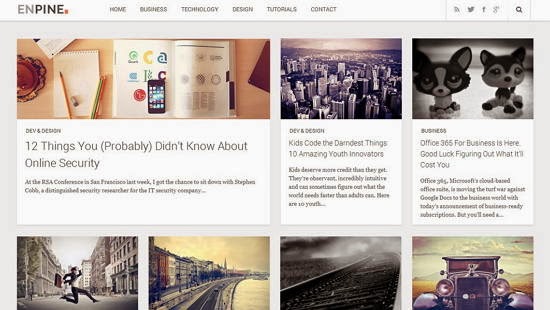
"The Journalist" is a simple blogger template built on the bootstrap framework. It features a fully responsive two column layout that adjusts perfectly to all screen sizes.
This quick loading theme is free and comes pre-installed with a simple text-based related posts and social sharing widget. It is ideal for journalists, writers and bloggers alike.

DemoDownload
Thats it! Please let us know of any anomalies / layout problems that you may find in the template.
This quick loading theme is free and comes pre-installed with a simple text-based related posts and social sharing widget. It is ideal for journalists, writers and bloggers alike.
DemoDownload
Profile Box
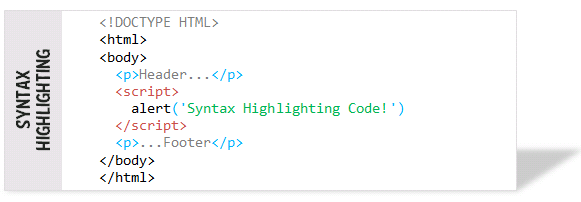
To add details about yourself in the Profile box on the sidebar, find the following code in the template and replace the information in blue with relevant details about yourself.<div class='profile-box'> <!-- Insert Link of your Profile Pic --> <img class='img-responsive pimg' src='https://blogger.googleusercontent.com/img/b/R29vZ2xl/AVvXsEh6Ar27ciiJvp48sxWOTsAFpqZeTSd0oF5YEepKEUU_NYNjBzY3nRPznihZwtfObn1gtYD84aVLZN22KZynnbf4OWeJbdShIca1DkGPi-LQKobIJxogtuh8awzjyDNoAJxcS5wMb19DQ1Q/s320/default-avatar.png'/> <!-- Add Name Here --> <h4>Wajahat Razzaq</h4> <!-- A line About Yourself --> <span>Writer, journalist and a budding academic. I write for the Huffington post.</span> </div>
Social Links
Link the social icons in the sidebar to your social profiles by modifying the following code in your template. Simply change the code in blue with relevant links to your social accounts.<div class="contact-box"> <a href="mailto:wajahat-xyz123@gmail.com?Subject=Hey!" target="_top"> <i class="fa fa-envelope-o" rel="tooltip" title="wajahat-xyz123@gmail.com"></i> </a> <a href="https://twitter.com/wajahat-xyz" target="_blank"> <i class="fa fa-twitter"></i> </a> <a href="https://facebook.com/wajahat-xyz" target="_blank"> <i class="fa fa-facebook"></i> </a> <a href="https://plus.google.com/wajahat-xyz" target="_blank"> <i class="fa fa-google-plus"></i> </a> <a href="https://youtube.com/wajahat-xyz" target="_blank"> <i class="fa fa-youtube-play" rel="tooltip" title="YouTube"></i> </a> </div>
Thats it! Please let us know of any anomalies / layout problems that you may find in the template.
![New Free Responsive Blogger Templates 2014 [Download Now]](http://4.bp.blogspot.com/-Hjv8uuST3uo/U8dxux20XdI/AAAAAAAADQQ/dWPP7FL7exc/s72-c/xmax-responsive-blogger-template.jpg)